When planning a bathroom renovation, one of the key aspects is the bathroom tiling process. This step-by-step procedure involves meticulous preparation, the right materials, and expert tiling techniques to ensure a long-lasting, waterproof, and aesthetically pleasing finish. This guide will walk through the various stages of bathroom tiling and offer insights into the best practices for achieving a professional result.
Preparation for Bathroom Tiling
The first phase of the bathroom tiling process involves proper preparation. Before installing any tiles, it’s essential to ensure that the bathroom surface is clean, dry, and free from any debris. Removing old tiles or any existing fixtures is a must. If the wall or floor has been damaged, repairs should be made to achieve a smooth and even surface.
After preparing the surface, the next step is waterproofing. Bathroom environments are exposed to a significant amount of moisture, which can lead to mold, mildew, and structural damage if not handled properly. A waterproof membrane should be applied to all areas that will come in contact with water, such as shower walls, floors, and areas around sinks and bathtubs. Once the waterproofing has dried and been tested, the bathroom is ready for the tiling process.
Choosing the Right Tiles for Your Bathroom
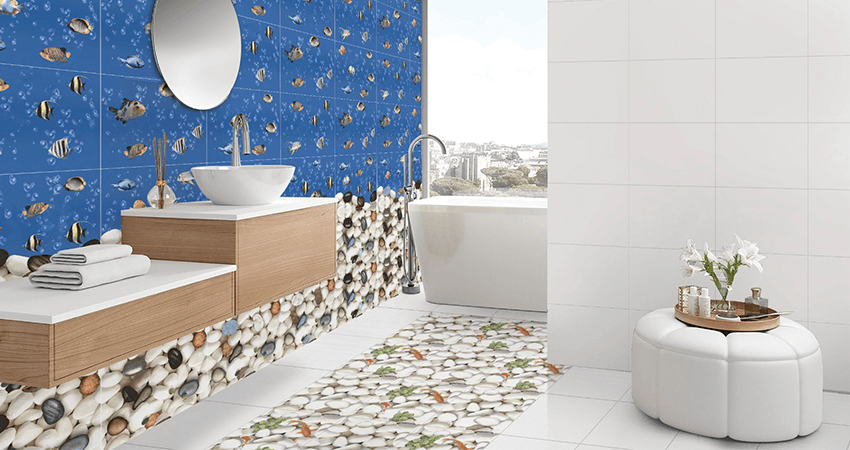
Selecting the appropriate tiles for the bathroom is critical for both design and functionality. When choosing tiles, it is essential to consider their material, texture, and size. Popular choices for bathroom tiles include ceramic, porcelain, and natural stone. Each material has its own unique characteristics and benefits, so it’s important to select one that complements the overall style of the bathroom and meets the practical requirements of durability and moisture resistance.
The texture of the tiles is also important. For bathroom floors, it’s advisable to choose tiles with a non-slip surface to reduce the risk of accidents in wet areas. Glossy or smooth tiles are better suited for walls where moisture does not pool. The size of the tiles can impact the overall appearance of the bathroom. Large tiles can make a small bathroom appear larger, while mosaic tiles are excellent for adding intricate details or visual interest.
Layout and Design Considerations
After choosing the tiles, the layout and design plan should be finalized before beginning the installation process. The layout will determine how the tiles are arranged, and it’s important to have a clear design in mind to avoid mistakes during installation. When planning the layout, it’s advisable to start from the center of the room or the focal point of the bathroom, such as the shower wall, and work outward. This ensures that any cut tiles will be located in less noticeable areas, such as near the edges or behind fixtures.
Planning ahead also includes deciding on the grout lines. Grout color can significantly affect the overall look of the bathroom. Lighter grout provides a seamless look but can be harder to keep clean, while darker grout provides contrast and hides stains but can create a busier appearance.
The Tiling Process
Once the preparation, tile selection, and layout are complete, the actual tiling process can begin. The first step is to mix and apply the tile adhesive. This adhesive should be applied in small sections to ensure that it doesn’t dry out before the tiles are placed. Use a notched trowel to spread the adhesive evenly across the surface, and place the tiles firmly into the adhesive, using tile spacers to maintain even grout lines.
It’s important to regularly check the alignment of the tiles to avoid any crooked lines. For walls, tiles should be applied from the bottom upward, allowing gravity to help keep the tiles in place. Once the tiles are set, it’s essential to leave them to dry for the recommended amount of time, typically 24 to 48 hours, before applying grout.
Grouting the Tiles
Grouting is the final step in the bathroom tiling process. After the adhesive has dried, the grout is applied between the tiles using a grout float. The grout should be spread diagonally across the tiles to ensure that it fills all the gaps evenly. Any excess grout should be wiped away with a damp sponge, and the grout should be allowed to dry for the recommended amount of time.
Once the grout has dried, it’s a good idea to seal the grout lines to protect them from moisture and staining. Grout sealing is especially important in bathrooms, where water exposure is high. Regularly maintaining the grout by resealing it can extend the life of the tiling and prevent damage.
Common Challenges in Bathroom Tiling
While the bathroom tiling process may seem straightforward, there are several challenges that can arise. One common issue is uneven surfaces, which can lead to tiles that don’t adhere properly or look crooked once installed. To avoid this, it’s essential to level the walls or floors before beginning the tiling process.
Another challenge is dealing with complex spaces such as around fixtures, corners, or curves. In these cases, tiles must be carefully measured and cut to fit the space. Using a tile cutter or wet saw can help achieve precise cuts, ensuring that the tiles fit snugly and securely.
Hiring a Professional Tiler
For homeowners who are unsure of their tiling skills or want to ensure a high-quality finish, hiring a professional tiler is an excellent option. A professional Bathroom Tiling expert has the experience and tools necessary to complete the job efficiently and to a high standard. Professional tilers can also offer design advice and help select the best tiles for the bathroom’s needs.
Hiring a professional Tiler Melbourne can also save time and reduce the stress of a bathroom renovation. Many tilers offer a guarantee on their work, providing peace of mind that the job will be completed correctly. It’s important to choose a tiler with a solid reputation and positive reviews to ensure a smooth and successful project.
Maintenance Tips for Bathroom Tiles
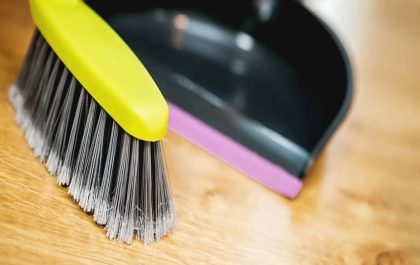
After the bathroom tiles have been installed, proper maintenance is essential to keep them looking their best. Regular cleaning is key to preventing the build-up of mold, mildew, and stains. Using a mild cleaning solution and a soft brush or sponge will help maintain the tiles without damaging them.
Grout lines should be resealed periodically to protect against water damage. In high-traffic areas, such as the shower or around the bathtub, the grout may wear down over time, leading to water infiltration. Keeping an eye on the condition of the grout and reapplying the sealant when necessary will prolong the life of the bathroom tiling and prevent costly repairs in the future.
Conclusion
The bathroom tiling process is a detailed and essential part of any bathroom renovation. By following the proper steps, from preparation to installation and maintenance, homeowners can achieve a durable and visually appealing result. Whether choosing to tackle the tiling project independently or hiring a professional tiler, understanding the process will help ensure the best outcome